
Cold repair of glass furnaces
Pool furnaces are the core equipment of glass factories. They are usually cold repaired every few years. Under normal circumstances, the reasons for cold repair are as follows.
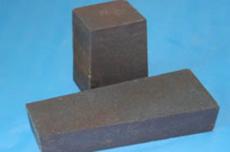
1. The refractory materials in contact with the glass liquid are seriously damaged, there is a risk of leakage, and it is difficult to perform local hot repairs.
2. The refractory materials of the upper structure are damaged, the leakage is serious, the glass cannot be melted normally, and various hot repair measures are ineffective.
3. The heat storage chamber is seriously blocked, so that the fuel consumption increases, the melting glass capacity decreases, and the cost increases significantly, and it is not economical to replace the checker bricks. Of course, there are various special circumstances that cause the tank furnace to be shut down for cold repair. For example, improper design makes it impossible to produce normally; the wrong choice of refractory materials causes a large number of stones and stripes; the tank furnace leaks seriously due to various reasons. The simplest cold repair only replaces the flow hole, the pool wall bricks and the heat storage chamber checker bricks. Medium-scale cold repairs also require the reconstruction of the pool bottom, small furnace and large arch. Large-scale cold repairs require all demolition and repair except the foundation and flue.
Generally, cold repairs are not simply repaired as they are, but must be combined with technical transformation.
Preparation before cold repair
1. Design and material preparation Before cold repair, according to the production plan of the new kiln and the experience of using the old kiln, the parts that need cold repair and the technical transformation plan should be proposed, and then theoretical calculations and structural design should be carried out, and the material plan required for cold repair should be proposed based on the structural design.
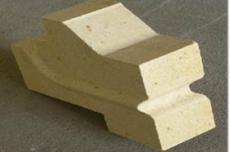
2. Brick preparation The materials used for masonry (mainly refractory materials) should be carefully inspected after arriving at the factory. Bricks that need to be processed should be ground and cut, and special parts should be pre-built.
3. Before planning and arranging cold repairs, list the project schedule in detail, let the specific construction personnel clarify the operation methods and quality requirements, and do a good job in personnel arrangement and training.
4. Review and line drawing of drawings Before construction, all drawings should be reviewed in detail, and errors should be corrected immediately. Before construction, the masonry position should be determined and lines should be drawn on site according to the drawings. The most important thing about drawing lines is to determine the center line, the drip center and the liquid level.
5. Standard lines and templates To ensure accurate masonry dimensions, standard lines or templates are required during masonry. Standard lines are generally marked with ropes to indicate the vertical and horizontal lines of each part, and templates are measured with standard shapes made of steel or wood. Before masonry, standard lines should be drawn and templates should be made.
6. Prepare masonry tools such as bricklaying, brick cutting, and mud mixing tools.
Discharging operation steps
Releasing the glass liquid in the melting furnace is an important part of cold repair work. The requirement for discharging work is safety and thoroughness. At present, there are two methods for discharging float glass melting furnaces:
One is to use the glass discharging pool to discharge; the other is to use the water quenching method to discharge water. Taking the use of the glass discharging pool as an example, the preparation and operation steps for discharging are described as follows.
1 Pre-discharging preparation work
a. Glass discharging pool, one week before discharging, drain the water in the pool, remove all debris in the pool, and rinse the sludge on the bottom and wall of the pool. A layer of broken glass slag about 100mm thick is laid on the bottom of the pool to prevent the discharged glass from sticking to the bottom of the pool. More broken glass slag should be laid near the discharge ditch, and then clean water is added to a sufficient depth, and water supply pipes and related tools are prepared.
b. Discharge hole: one day before discharge, remove the iron parts and air ducts at the corresponding parts outside the discharge hole, open and remove the two layers of bricks outside the hole bricks, and prepare a large iron bar to hit the third layer of hole bricks.
c. Discharge ditch: one week before discharge, clean the discharge ditch and rebuild it, lay quartz sand about 20mm thick on the bottom of the ditch, and then lay wood strips about 100mm thick to prevent the glass liquid from condensing and flowing.
d. Prepare a diesel spray gun and a corresponding oil supply system and barreled diesel at the outlet of the discharge hole and the tail of the discharge ditch to preheat the discharge ditch and heat the outlet of the discharge hole.
e. Contact the power supply, steam supply, and water supply units to ensure that the power supply, steam supply, and water supply are normal and stable during the discharge of the melting furnace.
f. Check all oil and steam systems, and prepare various tools and equipment to prepare for the purge of the oil system after the fire is stopped. And prepare large pipe clamps and force-added steel pipes for tightening the tie rods.
g. One day before the discharge, add kerosene or engine oil to lubricate the screws of the tie rods of the melting furnace so that it is easy to loosen and tighten the tie rods when the fire is stopped and the cold kiln is dismantled.
h. Check the fire-fighting facilities around the melting furnace, and the fire truck should store water on standby.
i. Arrange the division of labor, safety education, and tool preparation for the melting furnace discharge operation.
2 Melting operation
① 8h before discharge, notify the raw material workshop to stop batching, and prepare half a warehouse of broken glass on the kiln head silo (for covering the feeding pool before discharge).
② After the batching material is used up, cover the feeding pool with broken glass, pull out the feeder, and close the feeding pool.
③ After the melting furnace stops feeding, the tin bath part continues to pull the glass until it can no longer pull the glass normally, then the safety gate is lowered and the tin bath begins to be cleaned.
④ After the batch material is used up, the liquid level meter is removed.
⑤ 8 hours before discharging, the flames of the last two pairs of small furnaces are appropriately increased according to the situation to increase the glass liquid temperature of the cooling part. The first few pairs of small furnaces can maintain normal flames, and pay attention to the temperature in the kiln not being too high to avoid accidents of glass liquid flowing.
⑥ When the tin bath cannot pull the glass normally, the flow channel safety gate is lowered. Pull out the large water pipe and horizontal mixer, stop the fan, and block all the fire holes on the melting furnace.
Discharging
① Ignite the firewood in the discharge ditch 1 hour in advance, and ignite the fuel spray gun at the tail of the ditch to bake the discharge ditch.
② After the discharge ditch is heated, use a large iron bar to pound the opening bricks and start discharging. During the entire discharge period, monitor the flow of glass liquid at the overflow port of the hole brick, and deal with it in time when the liquid flow is not smooth.
③ Determine the stop time according to the falling speed of the glass liquid level in the kiln. After the stop, the combustion-supporting fan, pool wall cooling fan, steel slag fan, L-shaped wall fan and other temporary kiln protection fans are shut down one after another, and the exhaust gas exchanger gate is adjusted to the middle position.
④ During the discharge period and the subsequent cooling period, according to the cooling of the glass liquid in the glass water pool, water is continuously added in appropriate amounts to speed up the cooling speed. The kiln body is inspected and monitored during the discharge period.
3 Fuel system operation
① The residual glass liquid at the bottom of the melting pool is as little as possible. After the stop, it is required to ensure the steam supply of the heat network.
② When the fire is stopped, the oil pump room stops supplying oil, and the pipeline is immediately purged after the oil is stopped. Before steam purging, all valves (bypass valves) and diaphragm valves are opened to the maximum position. After the oil is stopped, the heating steam of the oil pipe is not stopped, and the heating steam is stopped after the purging is completed. After the purging is completed, the fuel spray gun can be removed.
③ The fuel flow meter is purged together with the pipeline (the valves before and after the flow meter should not be closed).
4 Cold kiln operation
① Open the large gate at the root of the chimney, the rotating gate of the main flue, and the gates of each branch flue.
② Remove the equipment and instruments of the fuel system around the melting furnace, such as the purge valve, the spray gun bracket, and the pressure gauge. Remove the thermocouples, pressure transmitters and other instruments on and around the melting furnace. Remove the pool wall kiln protection air duct and the steel crown ballast cooling air duct and the temporary kiln protection air duct and fan. After the pool wall cooling air duct is removed, the main pipe outlet below it should be covered with a prefabricated cover to prevent debris from falling into the air duct when the kiln is dismantled.
③ When the temperature of the large crown drops to 1000℃, check the kiln body. According to the fall speed of the crown, organize personnel to tighten the pull bars of each part and keep records. Ensure that the crown falls back evenly and the tension bar is maintained until the crown temperature drops to 100℃.
④ 24 hours after the discharge, open the doors of each heat storage chamber according to the kiln temperature and continue to cool the kiln.
⑤ After the kiln is cooled, conduct a comprehensive inspection of the kiln body, take photos of the erosion and make detailed records. A dedicated person should keep various records for the entire process. On the third day, the kiln dismantling work will begin and proceed according to the cold repair plan.


 HOME
HOME